As a WordPress developer, you’re no stranger to the power and versatility of WordPress. But with the release of the new Gutenberg editor, it’s likely that you may be feeling a bit overwhelmed. Don’t worry – my intention with this article is to help simplify things and get you up to speed on this exciting new development to WordPress.
In this post, we’ll go through a comprehensive overview of what Gutenberg is, how it works, and how you can use it to take your WordPress sites to the next level. Let’s get started!
So, what is Gutenberg?
At its core, Gutenberg is a new content editor for WordPress that replaces the old “Classic” editor. It was named after Johannes Gutenberg, the inventor of the printing press, as it aims to revolutionize the way we create and publish content on the web.
One of the main goals of Gutenberg is to make it easier for users to create and customize complex layouts without the need for shortcodes or custom HTML. It does this through the use of “blocks” – individual chunks of content that can be rearranged and customized to your heart’s desire.
For example, let’s say you want to add a button to your post. In the Classic editor, you might have to manually enter the HTML code for a button or use a shortcode. With Gutenberg, you can simply add a “Button” block and customize it with a few clicks.
But Gutenberg is about more than just blocks – it also introduces a new interface and workflow that streamlines the content creation process. The editor is now more visual, with a live preview of your content as you work. You can also use the “Document Outline” panel to easily navigate to different sections of your post.
Overall, Gutenberg represents a major shift in the way WordPress handles content creation. It’s not just a new editor – it’s a whole new way of thinking about how we build and structure our content.
How to Use Gutenberg
So, now that you have a basic understanding of what Gutenberg is, let’s dive into how you can use it to create beautiful and engaging content for your WordPress sites.
Adding Blocks
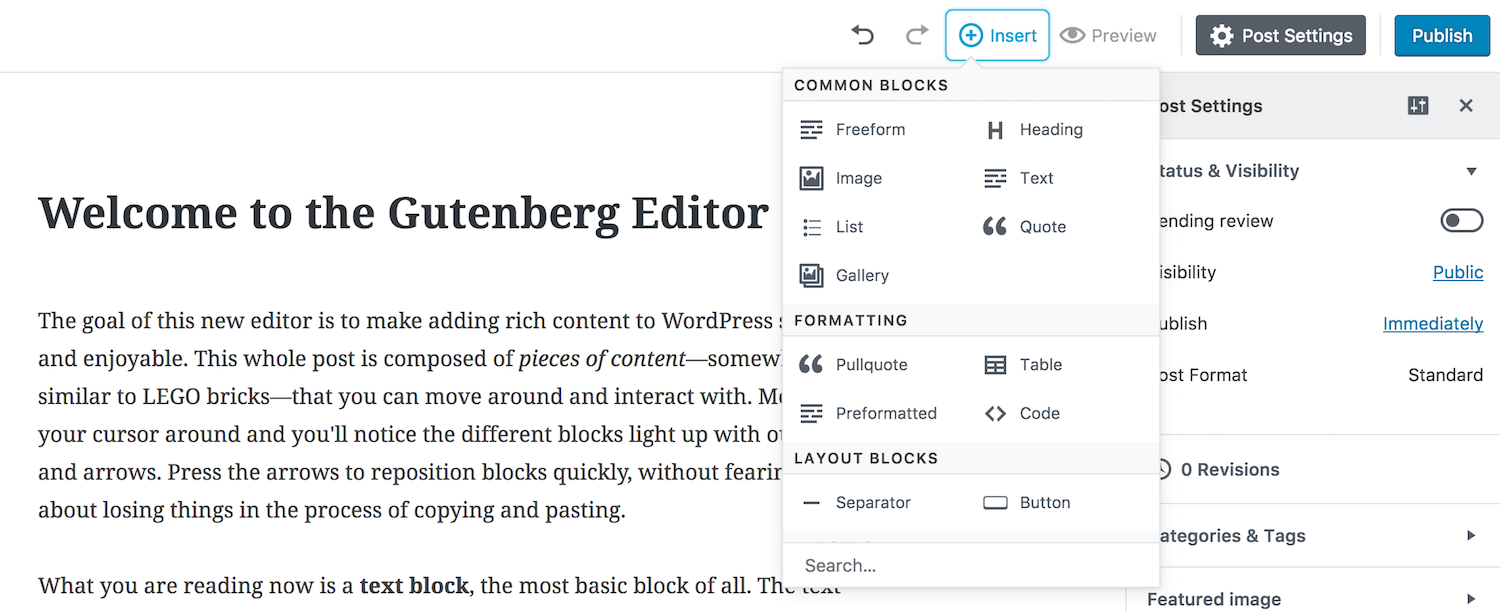
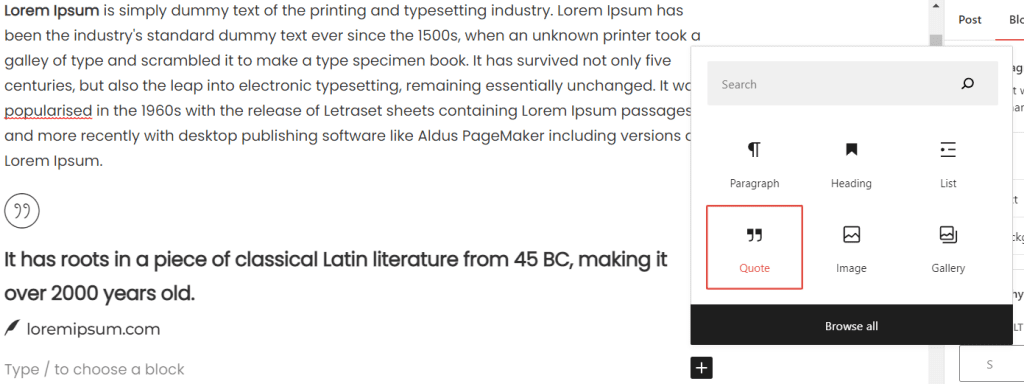
As mentioned earlier, the core element of Gutenberg is the block. Blocks are individual pieces of content that can be added, rearranged, and customized to create your desired layout.
To add a block, simply click the “+” icon in the top left corner of the editor. This will bring up a list of available blocks, including common elements like paragraphs, images, and buttons. You can also search for specific blocks or browse the different categories to find what you need.
Once you’ve added a block, you can customize it by clicking on it to bring up the block settings. This will vary depending on the block you’re using, but common options include things like text alignment, font size, and button text.
Creating Columns
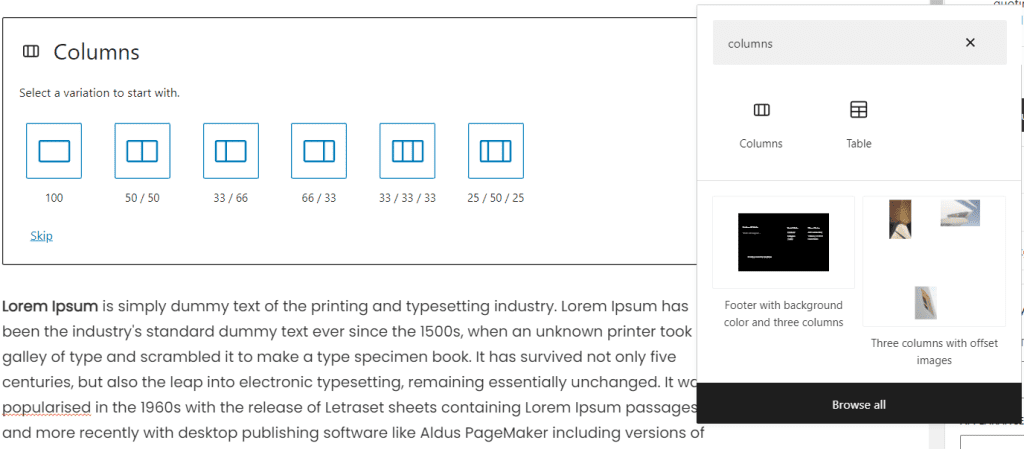
One of the most powerful features of Gutenberg is the ability to create multi-column layouts without the need for shortcodes or custom HTML. This is done using the “Columns” block.
To create columns, simply add a “Columns” block to your post and then add the individual blocks you want to include in each column. You can adjust the number of columns and the width of each column using the block settings.
It’s also worth noting that you can nest blocks within columns, allowing you to create even more complex layouts. For example, you could create a two-column layout and then add an image block and a paragraph block to the left column and a button block and a video block to the right column. The possibilities are endless!
Customizing Blocks
Gutenberg comes with a wide range of blocks out of the box, but if you want to add even more functionality, you can use custom blocks. These are blocks that are developed by third-party developers or created by you using the WordPress block API.
To use custom blocks, you’ll need to install a plugin that adds the desired blocks to the editor. There are many plugins available that offer a variety of custom blocks, including blocks for social media feeds, maps, and more.
In addition to using custom blocks, you can also customize the appearance of the default blocks using CSS. This can be done using the WordPress Customizer or by adding your own CSS styles to your theme’s style.css file.
Working with Templates

Another great feature of Gutenberg is the ability to save and reuse custom template blocks. This can be a huge time-saver if you find yourself creating similar layouts or types of content on a regular basis.
To create a reusable block, simply follow the steps below:
- Create your layout using the blocks you want to use.
- Select the block or blocks you want to save as a reusable block.
- Click on the three dots icon located on the top right corner of the block.
- Select the “Add to Reusable Blocks” option.
- Give your reusable block a name and click on the “Save” button.
To use the reusable block, you can insert it to any post or page using the “+” button and then select the “Reusable” option and select the reusable block you want to use. The blocks from the template will be inserted into your post, and you can then customize them as needed.
It’s worth noting that templates are global, meaning they can be used on any post or page on your site. This is a great way to ensure consistency in your content and save time when creating new posts.
Customizing the Editor Design
In addition to customizing the blocks, you can also customize the overall design of the Gutenberg editor. This can be done using the WordPress Customizer or by adding your own CSS styles to your theme.
For example, you might want to change the colors of the editor to match your brand, or you might want to adjust the font size or typeface to make the editor more readable.
You can also use plugins to add custom design elements to the editor. For example, you could use a plugin to add a custom header image or a custom footer to the editor.
Gutenberg and SEO
If you’re a WordPress developer, you know the importance of SEO (search engine optimization) in driving traffic to your site. So, you might be wondering how Gutenberg impacts SEO.
Overall, Gutenberg shouldn’t have a significant impact on your SEO efforts. The editor uses the same underlying structure as the Classic editor, so there’s no need to worry about any major changes to your site’s SEO.
That being said, there are a few things you can do to optimize your content for SEO when using Gutenberg:
- Use relevant and descriptive titles for your blocks – this will help search engines understand the content of your blocks and how they relate to your overall post.
- Use headings (H1, H2, etc.) appropriately – headings help signal the hierarchy of your content to search engines, so be sure to use them appropriately.
- Use the “Excerpt” field – the Excerpt field allows you to specify a summary of your post that will be displayed in search results. This is a great opportunity to include keywords and give search engines a clear idea of what your post is about.
- Use alt tags for images – alt tags are used to describe the content of an image to search engines. Be sure to include relevant and descriptive alt tags for any images you include in your posts.
Gutenberg vs. Classic Editor
By now, you’re probably wondering how Gutenberg compares to the old Classic editor. Well, there are a few key differences to consider.
First and foremost, Gutenberg introduces a new block-based approach to content creation, which allows for more flexibility and customization in terms of layout. It also has a more visual interface, with a live preview of your content as you work.
On the other hand, the Classic editor is more traditional in its approach, with a single WYSIWYG (what you see is what you get) editor for the entire post. It’s generally easier to use for users who are new to WordPress, but it lacks the advanced layout capabilities of Gutenberg.
Ultimately, which editor you choose will depend on your needs and preferences. If you’re comfortable with the Classic editor and don’t need the advanced layout capabilities of Gutenberg, there’s no need to switch. But if you want more control over your content and are willing to invest a bit of time learning the new interface, Gutenberg could be a great option for you.
Conclusion
Gutenberg may seem intimidating at first, but it’s a powerful tool that can help you create beautiful and engaging content for your WordPress sites. Whether you’re a seasoned WordPress developer or new to the platform, we hope this post has helped simplify the process of getting started with Gutenberg.
Of course, this is just the tip of the iceberg when it comes to what Gutenberg is capable of. To really get a feel for the editor, we recommend diving in and experimenting with the different blocks and features to see what works best for you. Happy creating!